
A Comprehensive Guide to Home Blood Pressure Monitoring: Step-by-Step Clinical Protocol
Home blood pressure monitoring is critical in contemporary clinical practice for the early detection, management, and prevention of cardiovascular pathologies. Hypertension—frequently termed the “silent killer”—affects millions globally, often progressing asymptomatically until significant target-organ damage occurs. While home evaluation is an invaluable tool for clinical follow-up and mitigating the “white-coat effect,” its diagnostic validity relies entirely on rigorous adherence to standardized measurement protocols.
In contemporary clinical practice, accurate measurement of arterial blood pressure is critical for the early detection, management, and prevention of cardiovascular pathologies. Hypertension—frequently termed the “silent killer”—affects millions globally, often progressing asymptomatically until significant target-organ damage occurs. While home blood pressure monitoring (HBPM) is an invaluable tool for clinical follow-up and mitigating the “white-coat effect,” its diagnostic validity relies entirely on rigorous adherence to standardized measurement protocols.Inaccurate positioning, recent ingestion of stimulants, or improper cuff selection can introduce substantial artifacts, leading to misdiagnosis or inappropriate therapeutic interventions. This evidence-based guide outlines the precise clinical methodology required to obtain accurate blood pressure readings at home.
1. Pre-Measurement Patient Standardization (The Preparation Phase)
An accurate hemodynamic reading begins 30 minutes prior to inflating the cuff. To minimize sympathetic nervous system activation, the following physiological stabilization steps must be implemented:
- Rest and Relaxation: The individual must remain seated quietly in a distraction-free environment for a minimum of 5 minutes before the initiation of the measurement.
- Avoidance of Stimulants: Consumption of caffeine, nicotine, alcohol, or sympathomimetic agents (such as certain decongestants) is strictly prohibited for at least 30 minutes prior to evaluation.
- Bladder Evacuation: A distended urinary bladder can artificially elevate systolic blood pressure by 10 to 15 mmHg due to reflex sympathetic stimulation. The bladder should be completely emptied before measurement.
- Postprandial State: Avoid executing measurements immediately following a heavy meal, as splanchnic blood pooling during digestion can alter systemic hemodynamics.
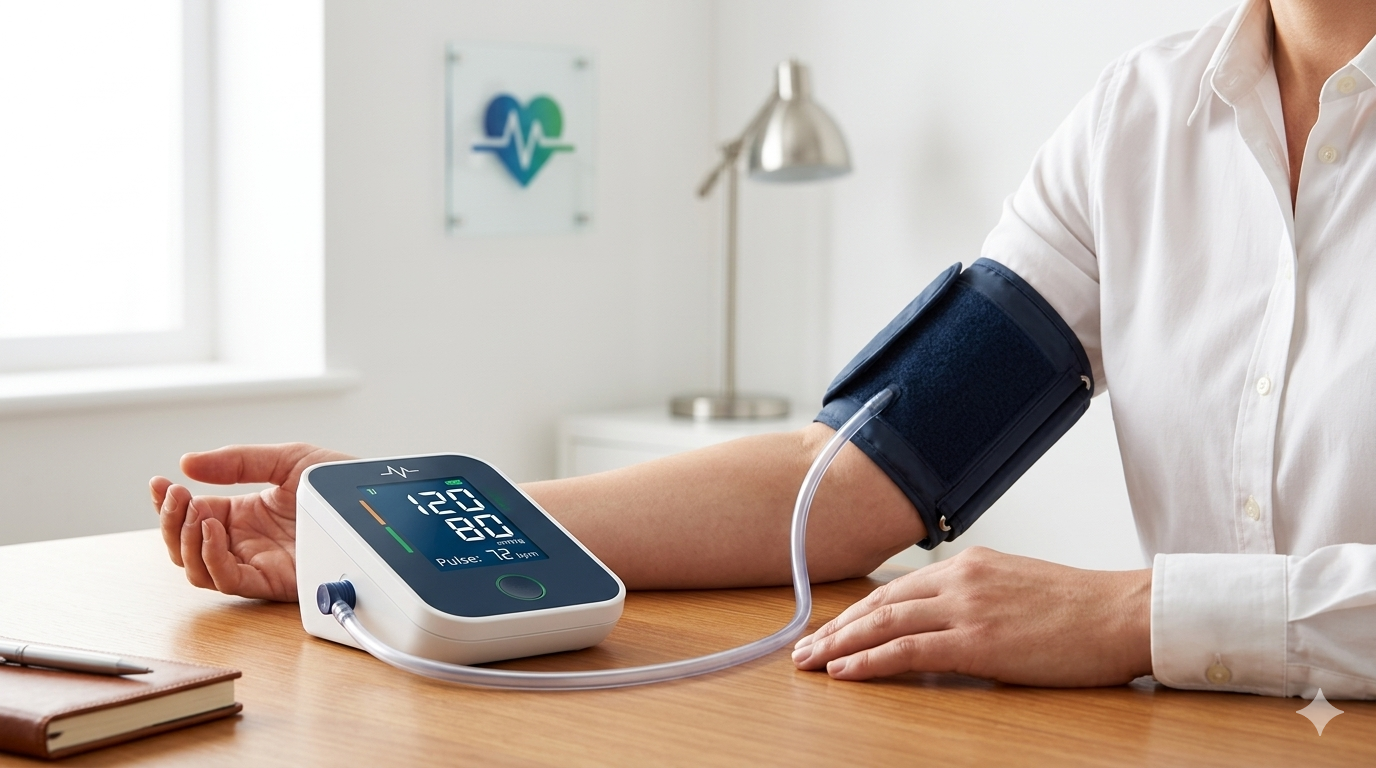
Fig. 1: Arterial Hemodynamic Standardization—Optimized cuff placement and resting posture as demonstrated by the subject, resulting in a normative reading of 120/80 mmHg.
2. Optimized Anatomical Positioning
Patient posture directly correlates with hydrostatic pressure alterations within the arterial system. For clinical accuracy, ensure the following postural alignment:
- Dorsal Support: The patient must sit upright with their back firmly supported against the chair backrest. Unsupported posture triggers isometric muscle contraction, which artificially inflates parameters.
- Foot Placement: Both feet must rest flat on the floor. Crossing the legs is strictly contraindicated, as it temporarily increases venous return and elevates systolic pressure.
- Arm Stabilization: The upper arm must be bare (free of restrictive clothing layers) and supported on a flat surface (e.g., a table). The positioned arm must remain at heart level (the level of the right atrium / mid-sternum). If the arm is positioned below heart level, readings will be falsely elevated; if above, they will be falsely low.
3. Proper Selection and Placement of the Sphygmomanometer Cuff
Cuff dimensions and anatomical positioning are primary determinants of accuracy in automated or manual sphygmomanometry:
- The lower margin of the cuff must be positioned approximately 2–3 cm superior to the antecubital fossa (the bend of the elbow).
- The cuff tightness must allow only two fingers to slip underneath comfortably. A cuff that is too loose yields falsely high readings, whereas a cuff that is too tight yields falsely low readings.
- The sensor marker or tubing on the cuff must align directly over the palpable trajectory of the brachial artery.
4. Measurement Execution and Hemodynamic Evaluation
- Verbal Isolation: The patient must remain completely silent and motionless during the inflation and deflation cycles. Speaking or moving can cause acute blood pressure spikes.
- Sequential Verification: If the initial reading deviates significantly from baseline trends, a second measurement should be taken after an interval of 1–2 minutes. The mathematical mean of these readings should be documented.
Standardized Adult Blood Pressure Thresholds (ACC/AHA Guidelines)
According to contemporary cardiological criteria, adult blood pressure classifications are defined as:
| Classification | Systolic Pressure (mmHg) | Diastolic Pressure (mmHg) |
|---|---|---|
| Normal | < 120 | and < 80 |
| Elevated | 120–129 | and < 80 |
| Hypertension (Stage 1) | 130–139 | or 80–89 |
| Hypertension (Stage 2) | ≥ 140 | or ≥ 90 |
⚠️ CLINICAL DISCLAIMER & PEDIATRIC MANIFESTO
The clinical parameters, physiological thresholds, and procedural steps detailed in this publication are optimized exclusively for mature adult demographics. It is critical to underscore that blood pressure dynamics, normative reference ranges, and cuff specifications for neonates, infants, and pediatric patients differ fundamentally from adult standards. Pediatric hemodynamic values must be interpreted strictly based on age, sex, and height percentiles by a qualified pediatric specialist. Home monitoring data should serve solely as a clinical log for professional review; patients must never independently adjust prescribed pharmacological regimens or dosages without explicit medical consultation.